Generating maps procedurally for Reckless Squad
We wanted Reckless Squad to be highly re-playable, so we wanted to generate a lot of things on the fly and randomly. This way, the game keeps re-inventing itself.
It’s also a big help for us developers, because we can’t afford to create all the maps by hand.
So, how does our algorithm works?
In Reckless Squad, every map is a "path" from a starting point to an end point. But it can't be a straight line, we want it to look natural.
The first step is to choose where the path will start. We chose the left half of the screen, because it’s what we’re used to in occidental cultures: we read from left to right. The starting point is on one of the screen’s edges. I choose the exact position randomly.
Once I have this starting point, I need an ending point. Same technique, except the point is now on the right half of the screen.
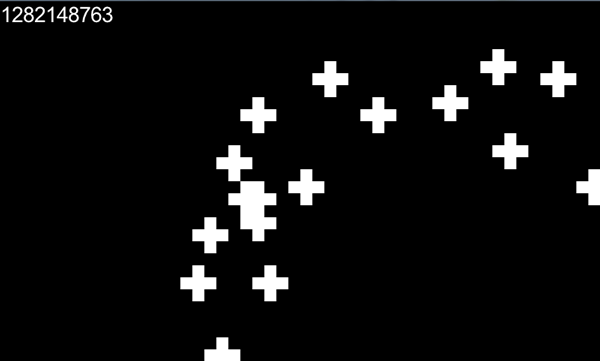
We also decided the path would always go by the center of the map, so I add this point between the two others. At this time, I already have three points for my path:
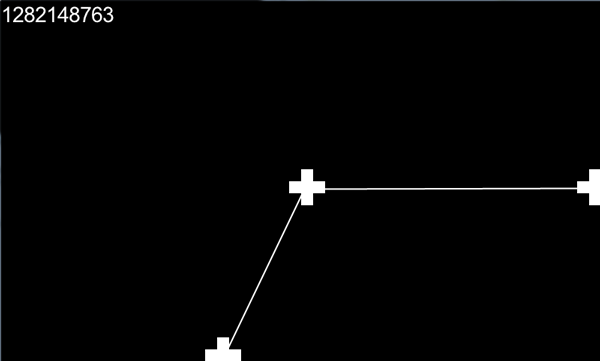
The map is a 2D grid. A black tile means it's a wall, and white means it's the ground. As you can see, the points are "drawn" on the map as crosses.
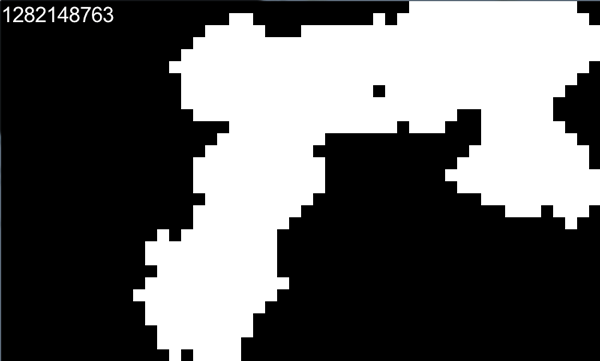
I then iterate on the points, two by two, and find a new point in-between. I apply some random disturbance to this point while checking that it’s still inside the map:
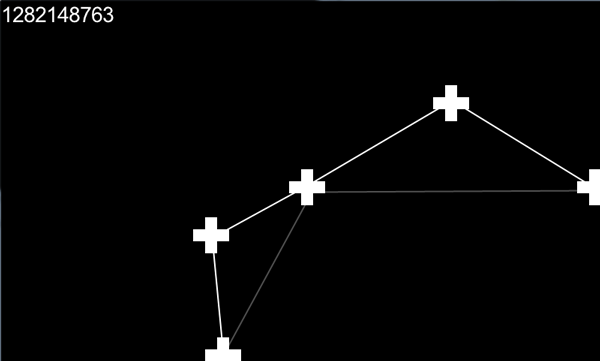
In gray you can see the old path, the new one is in white. I repeat the operation:
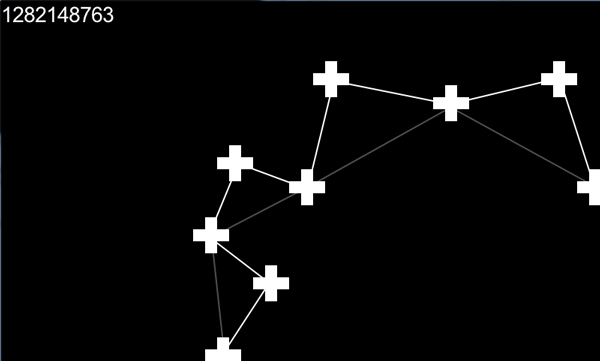
Again:
And again. An after a lot more iterations I have the outline of my map:
Now I want to "dress" the map to make it look good. My first step is to separate "lone elements" from the rest of the blocking area. Lone elements will be represented as trees, rocks, etc. They are in green in this image:

At this time, I want to add some "volume" to the maps. Reckless Squad uses a 4/3 top-down view like the old-school 2D RPG.
I decided that the lowest 2 tiles would be seen from the front and the rest from above. If you remember the maps from the good old SNES era:

The red part is the “block”, seen from above. The green part is the border that makes a transition between the block and what I call "the cliff": the blue part. This blue part is basically the wall seen from the front.
I apply the same concept to Reckless Squad’s maps:
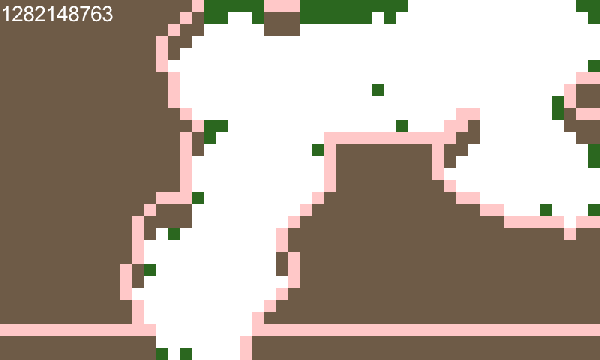
The border is drawn in this atrocious pink color, while the two tiles below represent the cliff.
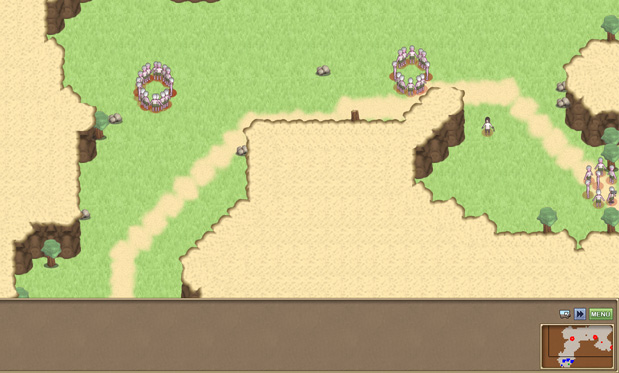
When all my tiles are marked as "grass", "block", "cliff", "border" or "lone", I want to add graphics to them. This part is very straightforward: I just add sprites on top of it. The sprites are sorted by layers to allow the perspective effect to work, so units are displayed on top of grass and cliffs, but behind the blocks and border.
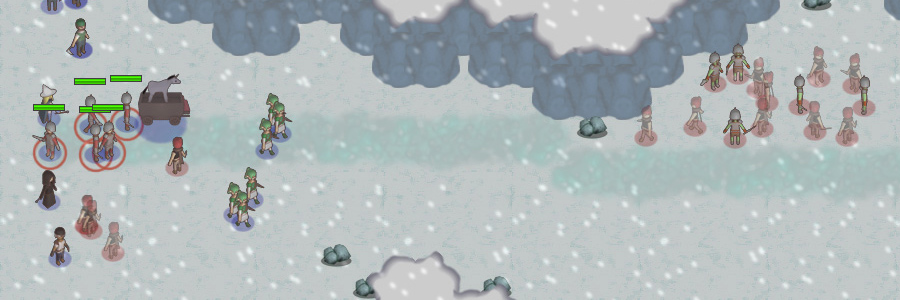
Here is the final result!
Voilà!